
How to Auto-Publish Blog Posts to WordPress
Getting a blog post to publish itself sounds like a developer project, but for most WordPress sites it takes under an hour and two recurring costs: your hosting and an AI SEO subscription. Once you know how to auto publish blog posts to WordPress, you stop logging in to hit "Publish" and start running a content engine that adds optimized articles on a schedule you set. This guide walks through the exact setup we use with AymarTech, the WordPress-native scheduling underneath it, where things break, and when a plain out-of-the-box connection beats custom code.
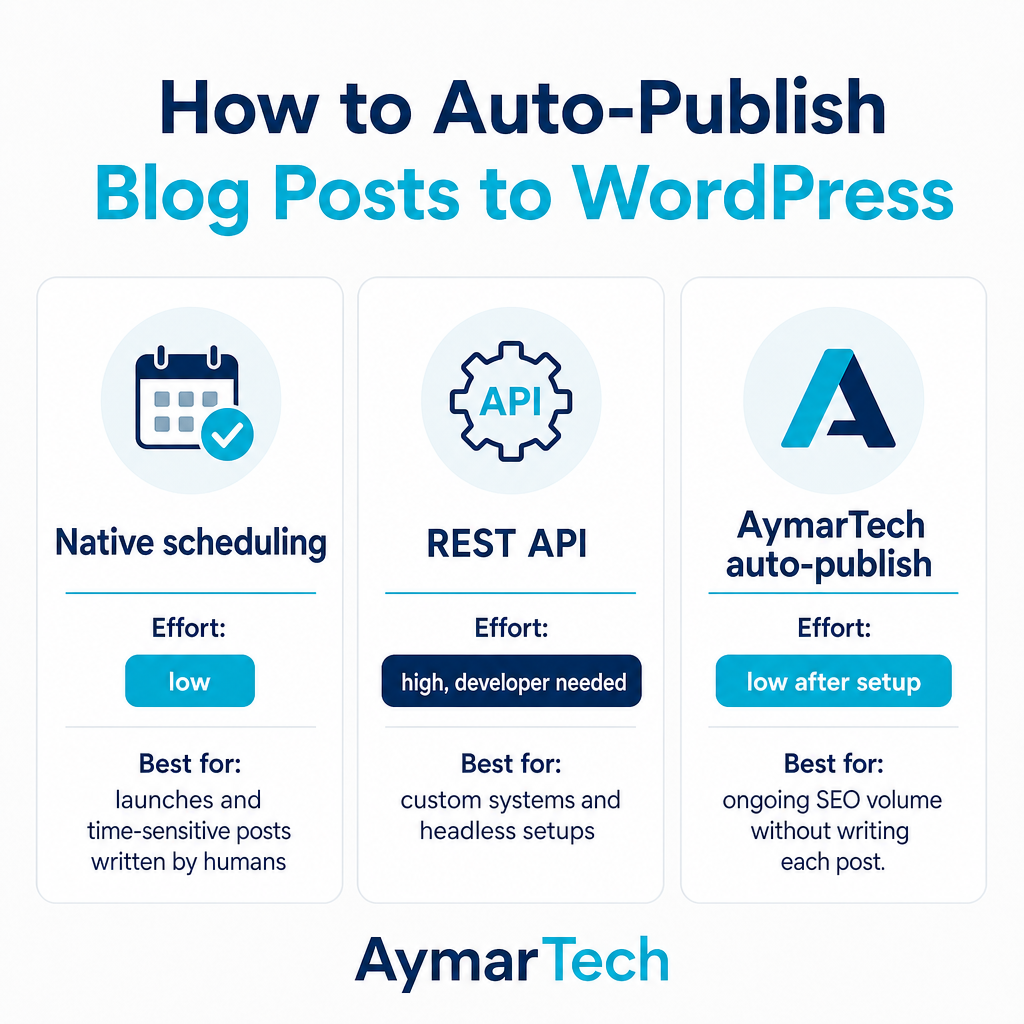
There are three practical routes. WordPress's built-in scheduling publishes a finished draft at a future date. The WordPress REST API lets an external system create and publish posts programmatically. And a platform like AymarTech researches keywords, writes brand-voice articles, and publishes them straight to your site on a cadence, then triggers auto-indexing so search engines and AI assistants can find them. Most teams we work with combine the first and third: AymarTech handles the volume, while a few flagship posts still get written and scheduled by hand.
Table of contents
- • What you need before you start
- • Step-by-step setup
- • Common mistakes and how to fix them
- • DIY or bring in a developer
- • Frequently asked questions
What you need before you start
Auto-publishing fails most often because of a missing prerequisite, not a broken tool. Confirm each item below before you touch any settings.
- A live WordPress site with admin access. Either WordPress.org (self-hosted) or WordPress.com works, but you need administrator rights to install plugins or manage integrations.
- HTTPS and a reliable host. Scheduled publishing depends on your server firing on time, so SSL and dependable hosting are non-negotiable.
- Backups and clear user roles. Keep regular backups so you can roll back if an automation misfires, and set roles (Admin, Editor) so you control who can connect external tools.
- A defined brand voice and topic lanes. AI-written content only sounds like you if you've told it how you sound and what you sell. Decide your tone and the products or services you want SEO content to target.
- Your WordPress URL and credentials ready. For a hands-off setup you'll connect AymarTech using your site address and secure credentials or authorization, so have those handy.
- An approval rule for sensitive content. In regulated sectors, decide up front which topics must pass human review before anything can go live.
If you're still deciding whether an automated platform fits your team at all, our plain-English breakdown of what an AI SEO platform actually does is a useful primer before you commit credentials.
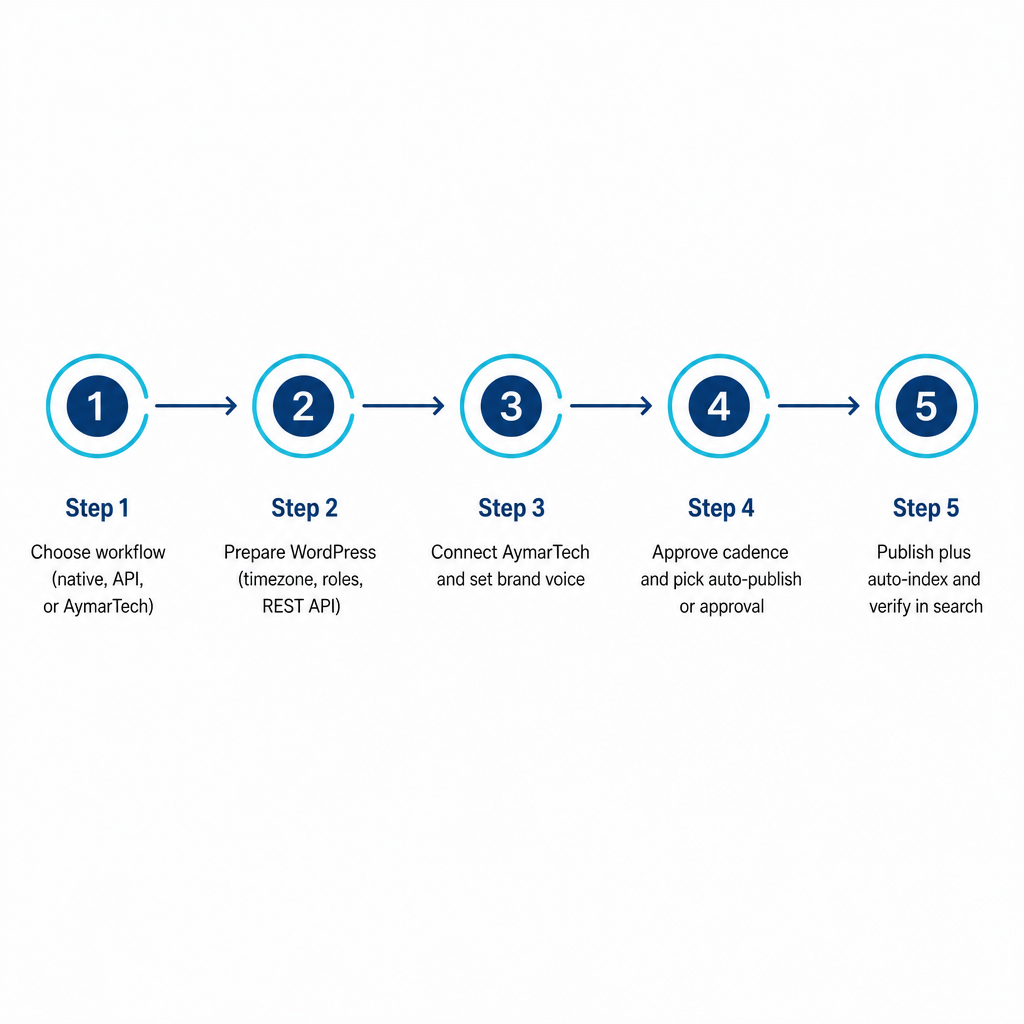
Step-by-step setup
Step 1: Pick your publishing workflow
Decide what "automatic" means for you. Native scheduling suits time-sensitive launches where a human writes the post but nobody wants to remember to click publish at 9 a.m. The REST API suits custom builds that post from a proprietary system. Fully automated SEO content suits teams that want ongoing volume without writing each article. There's no need to choose only one — a hybrid where AymarTech publishes the bulk and your team hand-schedules a few cornerstone pieces is the most common pattern we see.
Step 2: Prepare WordPress
Open your dashboard settings and confirm the site timezone matches your business location, so scheduled posts fire at the local time you expect. This single setting causes more "missed schedule" complaints than anything else. Next, confirm the editor's Publish panel lets you set a future date — WordPress flips a post from "Scheduled" to "Published" on its own when the time arrives.
If you plan any integration, WordPress exposes a REST API endpoint at /wp-json/wp/v2/posts that accepts authenticated requests to create posts. WordPress.com sites authenticate with site IDs and OAuth2 tokens. Whichever you use, connect with application passwords or tokens rather than sharing a raw admin login, and restrict those credentials to the minimal role needed — usually Editor — so an automation can publish posts but can't touch plugins or settings.
Step 3: Configure native scheduling as your baseline
Even if AymarTech will do the heavy lifting, set up native scheduling first so you understand the foundation. Create or edit a post, open the Publish settings, click the "Immediately" date/time control, and pick a future slot from the calendar. Then click Schedule instead of Publish. WordPress queues the post and publishes it at your chosen time. After that time passes, check your posts list to confirm the status reads "Published" and the article is live. Run this once with a throwaway test post — it's the fastest way to prove scheduling works on your host.
Step 4: Understand API publishing at a high level
If you need custom automation, the REST API is the manufacturer-supported route. In practice it means locating the endpoint (POST /wp/v2/posts), authenticating securely with OAuth2 tokens or application passwords, and sending a payload with fields like title, content, and status set to publish. A valid call returns JSON with the new post's ID; bad authentication returns 401 or 403 errors. Building and maintaining this reliably takes a developer, which is exactly why many teams skip it in favor of a platform that handles the whole content-and-publishing lifecycle.
Step 5: Connect AymarTech for hands-off publishing
This is where auto-publishing becomes genuinely hands-off. We not only write SEO-optimized posts, we publish them directly to WordPress.org or WordPress.com on the cadence you choose.
- Create your account and business profile. Add your business details, industry, and target audience so we understand what you sell and who you're reaching.
- Connect your WordPress site. In our CMS integration settings, link WordPress by supplying your site address and secure credentials or authorization. Once connected, we deliver finished posts through direct integration or API/webhook — no copy-paste.
- Set brand voice and topics. Choose your tone (formal, casual, technical) and core topics or products so drafts read like your team wrote them. You can also specify a geographic focus.
- Approve the plan and cadence. We research low-competition, intent-matched keywords and propose an editorial plan with a recommended frequency. You pick the rhythm — daily, weekly, or somewhere between.
- Choose auto-publish or approval. In auto-publish mode we write, fact-check, internally link, illustrate, and publish on your schedule. In approval mode, articles land as drafts and go live only after your team signs off.
- Enable auto-indexing and tracking. Once posts are live, we can trigger the Google Indexing API so new content is discovered quickly, then monitor rankings and AI citations so you see what's driving traffic.
- Verify end to end. Check your posts list for the expected titles, slugs, categories, and featured images, then spot-check a few URLs in Google Search to confirm indexing.
With this running, WordPress stays the stable home for your growing library while the research, drafting, optimization, and publishing happen on autopilot. If you want to see the finished output before committing, our live content examples show the kind of articles that land on your site.
Step 6: Keep control over quality and risk
Automation shouldn't mean abandonment. Decide which topics are always auto-approved and which require human review — anything touching legal, medical, or financial advice belongs in the review lane. In the first few weeks, read each published article for brand fit, accuracy, and compliance, and refine your voice and topic settings based on what you see in production. Finally, document exactly how to switch from auto-publish to draft/approval mode, so you can pause instantly when a campaign shifts or a compliance question comes up.
Common mistakes and how to fix them
Wrong timezone or scheduling assumptions. If posts publish at odd hours or appear "missed," your WordPress timezone likely doesn't match your local one, or your host's cron behaves differently than expected. Update the timezone setting and validate with a small test post before trusting the schedule.
REST API authentication failures. A 401 or 403 error means an invalid OAuth2 token or misconfigured application password or role. Regenerate the token, confirm the account can create posts, and double-check the endpoint URL.
Posts stuck in drafts. If content arrives in WordPress but never goes live, your workflow is probably set to "approval required," or the connected account lacks publish permission. Switch eligible content to auto-publish mode, or raise the integration's role so it can publish rather than only create drafts.
Duplicate or off-brand posts. Repeated topics or content that doesn't sound like you usually trace back to overlapping manual and automated calendars, or vague voice settings. Consolidate your editorial calendar and tighten your brand voice and topic parameters.
Indexing delays. New posts that don't show in search often just need time, but you can accelerate discovery with auto-indexing via Google's API and confirm status with a quick search test.
DIY or bring in a developer
Stay DIY when you're comfortable with the WordPress editor, your automation needs are straightforward — turning drafts into scheduled posts, basic categorization — and you're using an out-of-the-box integration to publish without custom API logic. In that world, setup is short and ongoing work is mostly monitoring and the occasional brand tweak.
Bring in a developer or agency when the requirements get structural: complex custom post types, custom taxonomies, or headless setups leaning on the REST API; multi-site or large enterprise deployments with custom OAuth flows; strict compliance layers where every post needs regulatory sign-off and audit logging; or deep syncing with a CRM, marketing automation stack, or proprietary dashboard via API and webhooks. In those cases, pairing our content automation with a developer-built workflow gives you both reliability and control. If you're weighing tools before deciding, our guide to choosing SEO content writing software covers the trade-offs in more depth.
Frequently asked questions
What does auto-publishing to WordPress actually mean?
It means posts move from draft to live automatically — either on a schedule you set inside WordPress or triggered by an external platform like AymarTech — without anyone clicking "Publish."
Does auto-publishing help SEO?
Auto-publishing on its own doesn't guarantee rankings. What it enables is consistent, keyword-targeted output, and that consistency supports organic growth when the posts are well-researched, optimized, and indexed.
Can AymarTech publish to both WordPress.org and WordPress.com?
Yes. We integrate with WordPress.org and WordPress.com, along with other CMS platforms, so finished posts are delivered directly to your site through a connection you set up once.
Can I still review posts before they go live?
Yes. You can choose an approval workflow where articles arrive as drafts in WordPress and your team approves them before publishing, instead of full auto-publish.
How long does setup usually take?
Most teams configure WordPress scheduling and connect AymarTech in under an hour, especially when WordPress is already in use and credentials are ready.
Is auto-publishing safe for regulated industries?
Technically yes, but regulated businesses should keep an approval step so sensitive topics are reviewed before going live, aligned with internal compliance policy.